- Django Basic Concepts
- Django - Home
- Django - Basics
- Django - Overview
- Django - Environment
- Django - Creating a Project
- Django - Apps Life Cycle
- Django - Creating Views
- Django - URL Mapping
- Django - Templates System
- Django - MVT
- Django Admin
- Django Admin - Interface
- Django Admin - Create User
- Django Admin - Include Models
- Django Admin - Set Fields to Display
- Django Admin - Update Objects
- Django Models
- Django - Models
- Django - Insert Data
- Django - Update Data
- Django - Delete Data
- Django - Update Model
- Django Advanced
- Django - Page Redirection
- Django - Sending E-mails
- Django - Generic Views
- Django - Form Processing
- Django - File Uploading
- Django - Apache Setup
- Django - Cookies Handling
- Django - Sessions
- Django - Caching
- Django - Comments
- Django - RSS
- Django - AJAX
- Django Useful Resources
- Django - Quick Guide
- Django - Useful Resources
- Django - Discussion
Django Admin – Include Models
When a new project is initialized with the startproject command, Django automatically installs a few apps, the list of these apps can be found in the INSTALLED_APPS parameter of the project’s settings module.
# Application definition

INSTALLED_APPS = [
   'django.contrib.admin',
   'django.contrib.auth',
   'django.contrib.contenttypes',
   'django.contrib.sessions',
   'django.contrib.messages',
   'django.contrib.staticfiles',
]
To be able to log into the admin site, the models – Groups and Users are automatically registered with the Admin site.
Hence, as we log into the admin site at the URL http://localhost:8000/admin with the superuser credentials, we get to see the Groups and Users tables on the homepage.
However, the models declared in the other apps are not automatically registered. You need to do so in the "admin.py" module present in the app’s package folder.
First, we create a new Django app −
Python manage.py startapp myapp
Next, we include it in the list of INSTALLED_APPS.
# Application definition

INSTALLED_APPS = [
   'django.contrib.admin',
   'django.contrib.auth',
   'django.contrib.contenttypes',
   'django.contrib.sessions',
   'django.contrib.messages',
   'django.contrib.staticfiles',
   'myapp',
]
All the models to be used are defined in the "models.py" file. Let us define the employee model as follows −
from django.db import models

# Create your models here.
class Employee(models.Model):
   empno = models.CharField(max_length=20)
   empname = models.CharField(max_length=100)
   contact = models.CharField(max_length=15)
   salary = models.IntegerField()
   joined_date = models.DateField(null=True)
   class Meta:
      db_table = "employee"
We must create the migration script and run the migrations.
python manage.py makemigrations myapp
python manage.py migrate
This will now create the Employee model. We now have to add this model to the admin interface. For that, open the "admin.py" file, import the employee model, and call the admin.register() function.
from django.contrib import admin

# Register your models here.
from .models import Employee

admin.site.register(Employee)
After taking these steps, start the Django server −
Python manage.py runserver
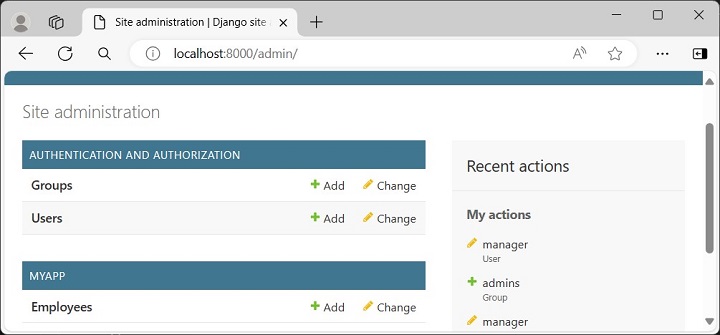
Open the browser and visit the admin URL http://localhost:8000/admin which will now show the newly registered model under MYAPP.

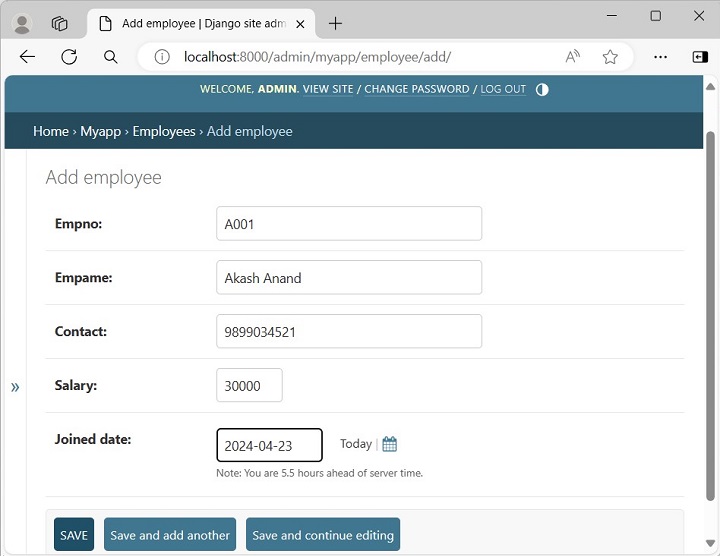
To add new employee objects, click the + Add button −

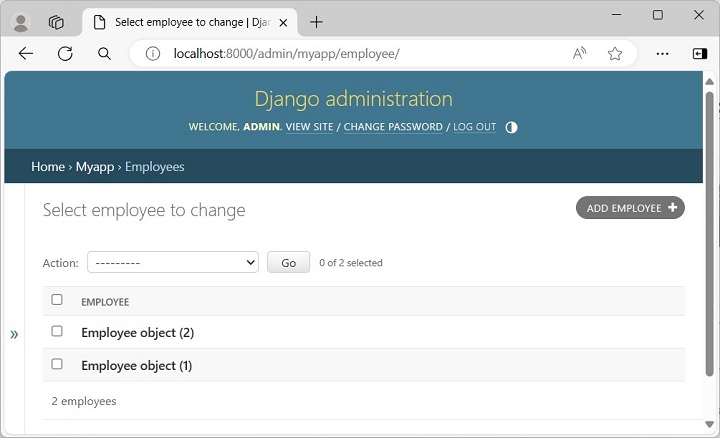
Click the Employees model to expand its collection −

The list above shows "Employee object (1)", "Employee object (2)" without any details as it is the default string representation of the object.
In order to display more meaningful representations, we can add a __str__() method in the employee model.
To Continue Learning Please Login